
In the world of fitness, some exercises get all the glory, while others quietly work their magic behind the scenes. The face pull is definitely one of those unsung heroes. It might not look as impressive as a bench press or a deadlift, but its impact on your shoulder health, posture, and overall upper body strength is truly remarkable.
If you’ve ever felt a nagging pain in your shoulders, suffered from “desk posture,” or just want to build a more balanced, resilient physique, the face pull deserves a prime spot in your routine. This guide will walk you through everything you need to know, from perfect form to the many benefits and exciting variations. Let’s unlock the power of strong, healthy shoulders together.
What Exactly is the Face Pull?
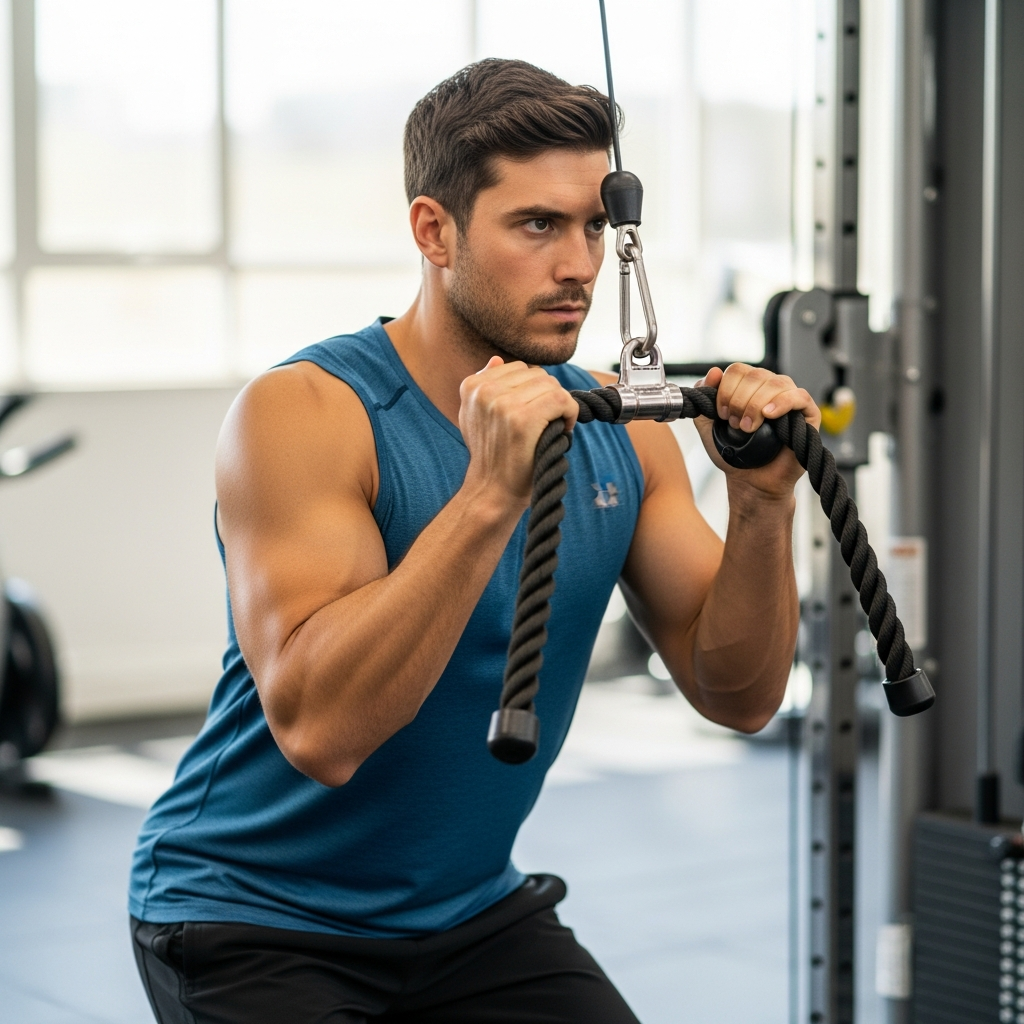
The face pull is a resistance exercise that primarily targets the muscles of your upper back and shoulders, specifically your rear deltoids, rhomboids, and the often-neglected rotator cuff muscles. It’s typically performed using a cable machine with a rope attachment or a resistance band.
Think of it as the antidote to all the pushing movements we do in daily life and in the gym. While presses strengthen the front of your body, face pulls pull your shoulders back and activate the muscles essential for shoulder stability and good posture. It’s a simple movement with profound benefits for anyone serious about long-term fitness.
The Unsung Benefits of Incorporating Face Pulls
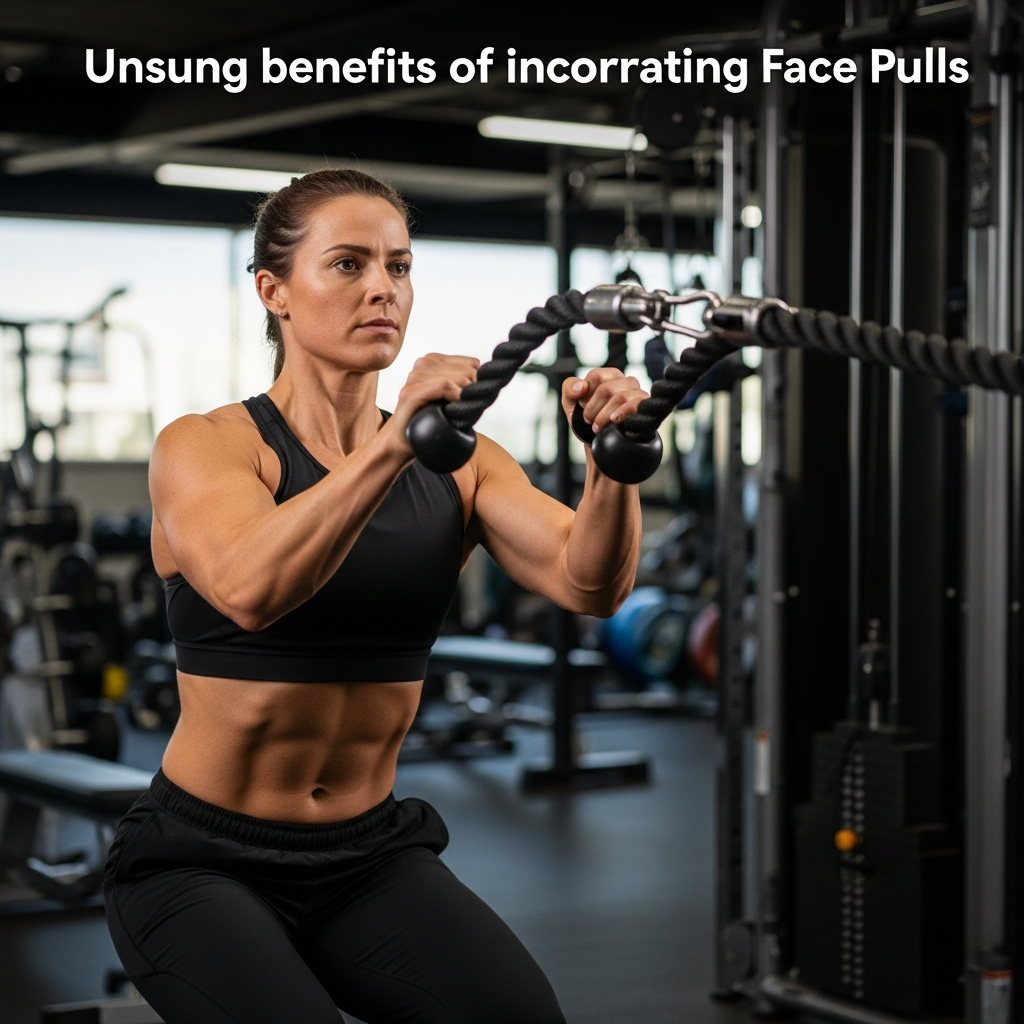
Adding face pulls to your workout routine is like investing in a long-term health plan for your upper body. The advantages extend far beyond just looking good.
Improved Shoulder Health and Stability
Many people suffer from shoulder pain or injuries because of muscle imbalances. We tend to focus heavily on chest and front shoulder exercises, neglecting the opposing muscles in the back. This imbalance can pull your shoulders forward and make them vulnerable.
Face pulls directly address this by strengthening the rear deltoids and rotator cuff. This helps to stabilize the shoulder joint, keeping it properly aligned and reducing the risk of strains, impingements, and other common issues. It’s truly preventative medicine for your shoulders.
Better Posture and Spinal Alignment
Modern life, with its endless hours of sitting and looking at screens, often leads to rounded shoulders and a hunched upper back. This is what we call “desk posture” or upper cross syndrome. It doesn’t just look bad; it can cause neck pain, headaches, and breathing difficulties.
The face pull is a powerful tool for correcting this. By strengthening the muscles that pull your shoulder blades together and back, it helps to pull your shoulders into a more natural, upright position. Regular face pulls can genuinely help you stand taller and move with more confidence.
Enhanced Athletic Performance
Whether you’re an athlete, a weekend warrior, or just someone who enjoys an active lifestyle, strong and stable shoulders are crucial. Activities like throwing a ball, swimming, playing tennis, or even just lifting groceries all rely on healthy shoulder mechanics.
Face pulls build the foundational strength and stability needed for these movements. They improve the function of your rotator cuff, which is vital for overhead movements and injury prevention. This means you can perform better and reduce your risk of setbacks.
Stronger, More Balanced Physique
If you’re looking to build a well-rounded, aesthetically pleasing physique, you can’t ignore your rear delts. Neglecting them can lead to shoulders that look flat or underdeveloped from the side.
Face pulls specifically target these muscles, adding depth and definition to your shoulders. This creates a more balanced look, complementing your chest and front deltoids. It contributes to a strong, capable appearance from every angle.
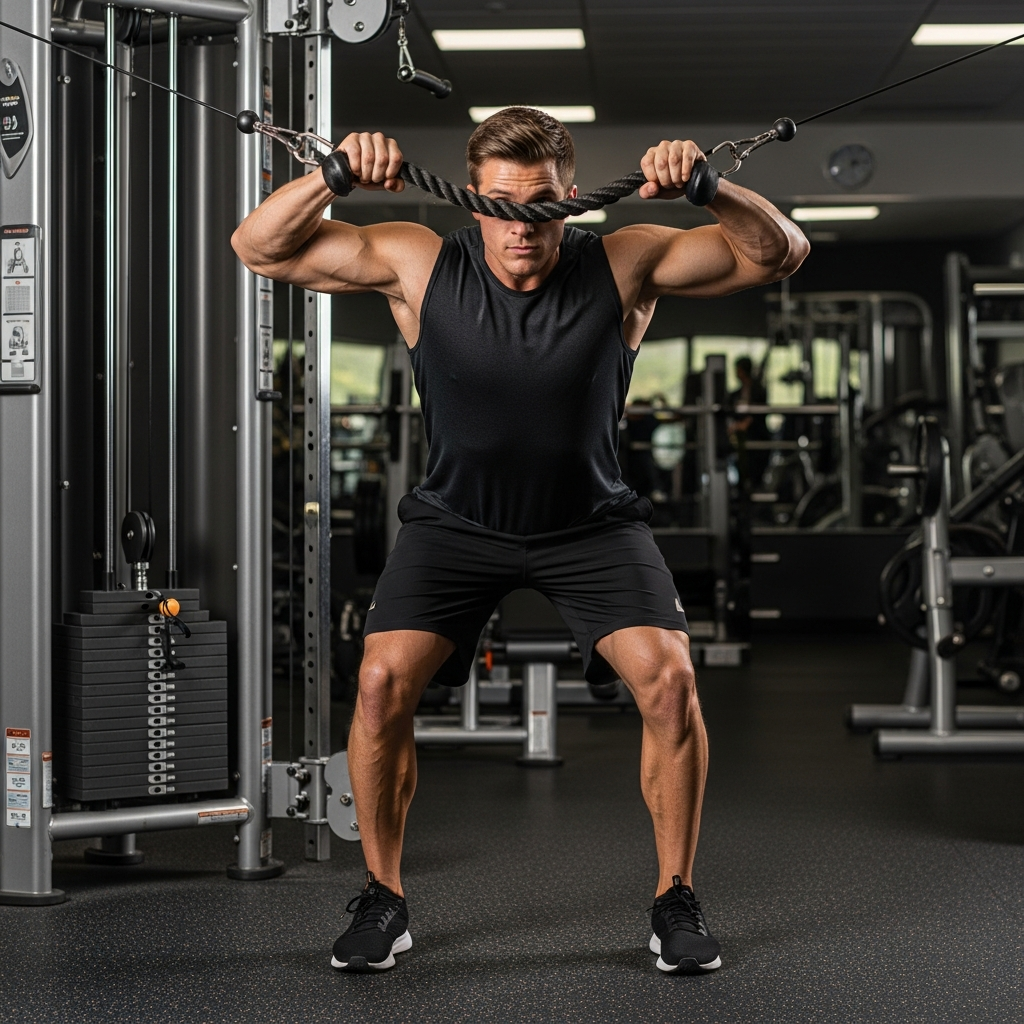
Mastering the Face Pull: Step-by-Step Form Guide
Perfect form is crucial for getting the most out of the face pull and avoiding injury. Don’t let its simplicity fool you; subtle cues make all the difference.
Setup is Key: Getting Ready
Before you even touch the weight, ensure your setup is spot on. This foundation will dictate the effectiveness of the exercise.
* Choose Your Equipment: The most common setup is a cable machine with a rope attachment. If you’re at home, a resistance band anchored to a sturdy object (like a door frame or a pole) works perfectly.
* Adjust the Height: Set the cable pulley (or band anchor) to about eye level or slightly above. This angle helps target the rear deltoids effectively.
* Grip the Rope: Grab each end of the rope attachment with an overhand grip, palms facing down. Your thumbs should be pointing towards you, almost like you’re going to pull the rope apart.
* Find Your Stance: Step back from the machine until the cable is taut and your arms are fully extended. Stand with your feet shoulder-width apart, perhaps one foot slightly in front of the other for balance, and a soft bend in your knees. Lean back very slightly from your ankles, creating a stable base.
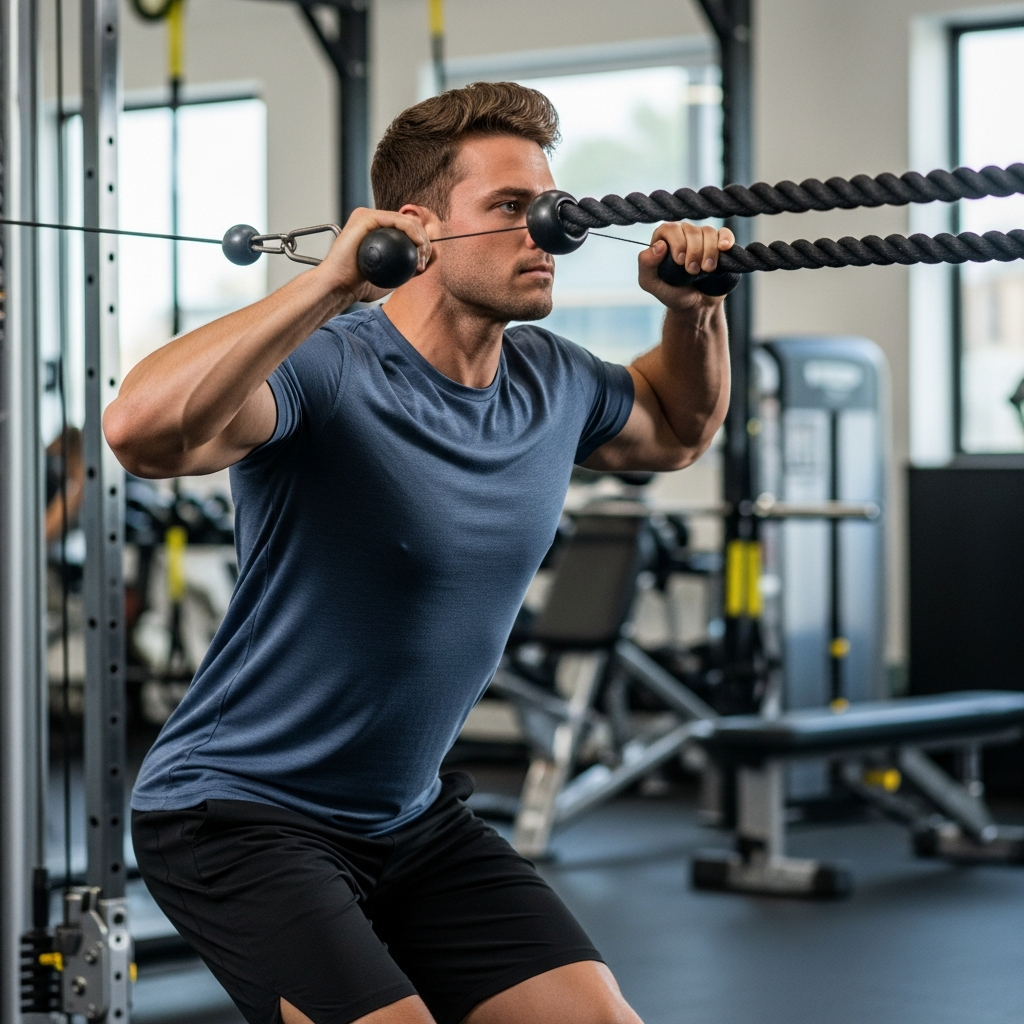
The Execution: Pulling It Off
Now for the movement itself. Focus on control and muscle engagement rather than just pulling the weight.
* Initiate the Pull: Start the movement by thinking about pulling your elbows back and wide. Don’t just use your biceps to yank the weight.
* Pull Towards Your Face: As your elbows come back, pull the rope towards your face, aiming for a point between your eyes and chin.
* Elbows High and Out: Crucially, keep your elbows higher than your hands throughout the pull. They should track outwards, creating a “W” shape with your arms. This ensures maximum engagement of your rear deltoids and upper back.
* Squeeze and Hold: At the peak of the movement, squeeze your shoulder blades together hard. Imagine trying to crush something between your shoulder blades. Hold this contraction for a brief second.
* Controlled Return: Slowly and deliberately extend your arms back to the starting position. Resist the weight as it tries to pull your shoulders forward. Maintain control throughout the entire range of motion. This “negative” phase is just as important as the pull.
Common Mistakes to Avoid
Even seasoned lifters can fall victim to these common errors. Being aware of them will help you refine your technique.
* Using Too Much Weight: This is the most common mistake. Heavy weight leads to poor form, often turning it into a bicep curl or a shrug. You want to feel the muscles in your upper back and rear shoulders working, not just pulling with brute force.
* Leading with Biceps: If your biceps are burning more than your upper back, you’re likely using them too much. Focus on driving your elbows back and wide to engage the target muscles.
* Flaring Elbows Too Low: If your elbows drop below your hands, you’re not getting the proper external rotation or rear delt engagement. Keep those elbows high!
* Not Controlling the Negative: Letting the weight snap back quickly robs you of half the exercise’s benefits and can be risky for your shoulders. Always control the eccentric (lengthening) phase.
* Rounding the Back: Keep your chest up and your core engaged throughout the movement. A rounded back indicates poor posture during the exercise itself and can strain your spine.
Variations to Keep Things Interesting and Challenging
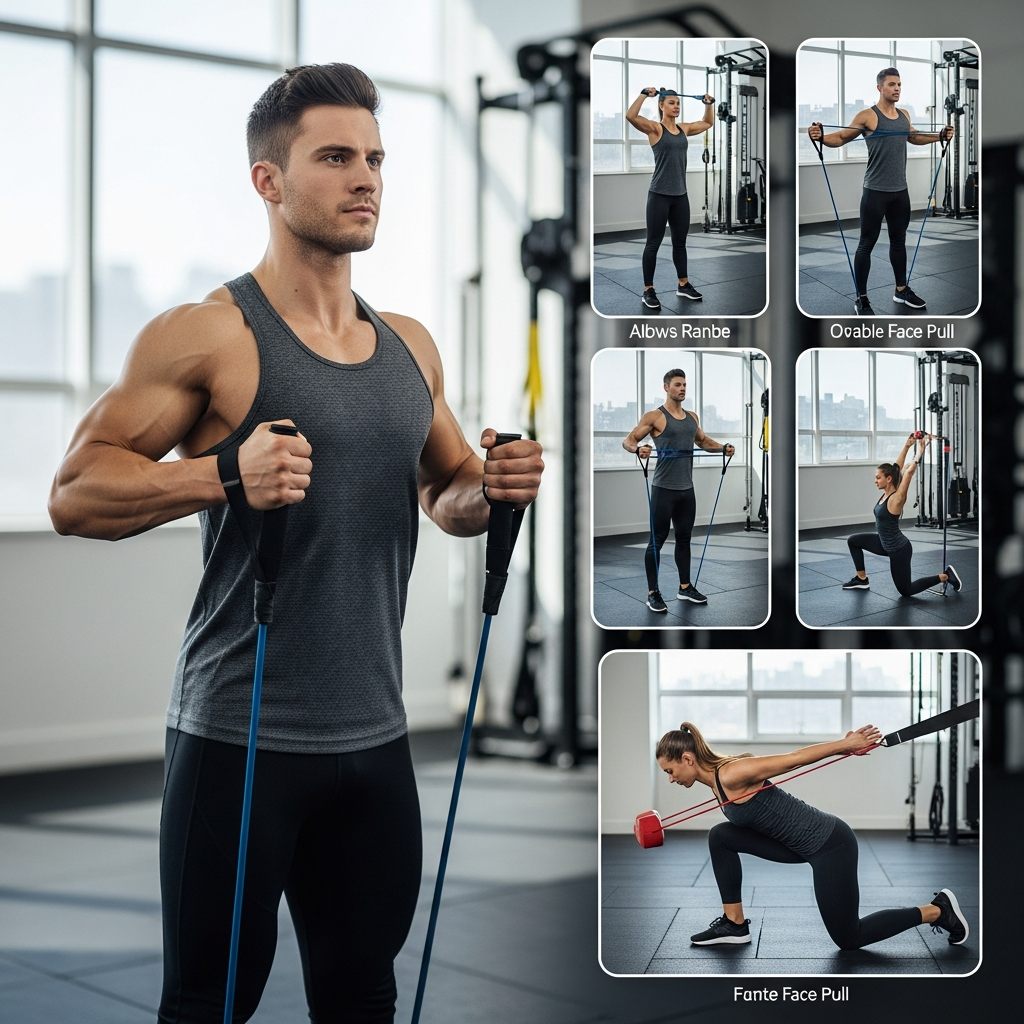
Once you’ve mastered the standard face pull, you might want to explore some variations to keep your routine fresh or to address specific needs.
Cable Face Pull (Standard)
This is the classic and most effective method, offering consistent tension throughout the movement. The cable allows for a smooth, controlled motion, making it ideal for learning the form and for progressive overload. Always prioritize form over lifting heavy weight here.
Resistance Band Face Pull
Perfect for home workouts, travel, or as a warm-up. Anchor a strong resistance band to a sturdy point. The principles of form remain the same: pull towards your face with elbows high and wide. The resistance often increases as you pull, providing a unique challenge.
Kneeling Face Pull
Performing face pulls from a kneeling position helps to eliminate any potential leg drive or body English, forcing your upper body and core to work harder. This variation can be great for isolating the target muscles and ensuring a pure pull. Just make sure your knees are comfortable on a mat.
Single-Arm Face Pull
If you suspect you have a strength imbalance between your left and right sides, the single-arm face pull is an excellent diagnostic and corrective tool. It allows you to focus intensely on one side at a time, ensuring each shoulder gets adequate attention. Use a D-handle attachment on a cable machine for this.
High-Rep vs. Low-Rep Focus
For face pulls, a higher rep range (12-20 reps) is generally recommended. This allows you to really focus on muscle contraction and endurance, which is crucial for shoulder health and posture. However, occasionally experimenting with slightly heavier weight for lower reps (8-12) can also be beneficial for building raw strength, as long as form is strictly maintained.
Incorporating Face Pulls into Your Routine
Knowing how to do face pulls is one thing; knowing when and how often to do them is another. Here’s how you can seamlessly integrate them into your fitness regimen.
When to Do Them
Face pulls are incredibly versatile and can fit into various parts of your workout.
* Warm-up: A few light sets can be an excellent way to activate your rear delts and rotator cuff before heavier pressing movements. This prepares your shoulders for the work ahead.
* Accessory Work: As an accessory exercise, they perfectly complement your main lifts. You can perform them after your primary chest or shoulder pressing movements.
* Upper Body Days: If you have dedicated upper body days, face pulls are a must-add to balance out all the pushing.
* Posture Focus: If your main goal is posture correction, you might even consider doing a few sets of resistance band face pulls daily or every other day.
Sample Weekly Workout Integration
Here are some ideas on how to weave face pulls into your weekly schedule.
| Day | Workout Focus | Face Pull Recommendation |
| Monday | Full Body / Push | 3 sets of 15-20 reps (moderate weight) after main lifts |
| Tuesday | Rest / Active Rec. | Optional: 2 sets of 20 band face pulls (light, focus on squeeze) |
| Wednesday | Full Body / Pull | 3-4 sets of 12-15 reps (focused on strength) |
| Thursday | Rest | |
| Friday | Upper Body | 3 sets of 15-20 reps (focus on high quality movement) |
| Saturday | Lower Body | Optional: 2 sets of 20 band face pulls as warm-up |
| Sunday | Rest | |
Remember, this is a sample. Adjust sets and reps based on your individual fitness level, goals, and recovery capacity. The key is consistency.
Mindset for Consistency: Making It a Habit
Like any beneficial exercise, face pulls only work if you do them consistently. Here’s how to ensure they become a regular part of your routine.
* Start Small: Don’t try to do too much too soon. Begin with 2-3 sets, 2-3 times a week, and gradually increase as you get stronger and more comfortable.
* Track Progress: Keep a simple log of your sets, reps, and the weight/band resistance you use. Seeing your progress, however small, can be incredibly motivating.
* Understand the “Why“: Remind yourself regularly *why* you’re doing face pulls. Is it for pain relief, better posture, or improved lifting performance? Connecting to your goals makes adherence easier.
* Listen to Your Body: If you feel any sharp pain, stop immediately. Exercise should feel challenging, not painful. Adjust the weight, your form, or take a rest day if needed.
* Make it a Non-Negotiable: Just like brushing your teeth, make face pulls a part of your routine that you don’t skip. Even on busy days, a quick set with a band can make a difference.